
Use your trash that maybe you put in trash to do beautiful things and gift for friends.
More details of materials used in my blog.



2. Next, use your nestability Oval scalloped die to cut out 4 ovals. Run each through an embossing pocket – I used a cuttlebug Xmas Snowflakes one!!
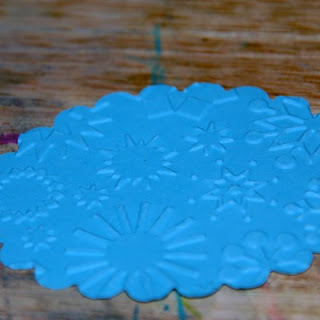
3. Once embossed, rub a white ink pad over the top of the raised section of each scalloped oval then a co-ordinating ink pad over the edges.

4. Adhere each of the oval over each other, ensuring a ¼ inch offset.
5. Finally, ensuring your oval set is laid in front of you in portrait style, mark the centre top of the bundle. This will be your cutting point for the 2 cuts you will make. Next, mark 2 radiating lines from this point, you should end up with an upside down cone shape and cut. Turn around and your tree is complete.
6. It’s now up to you to complete your card. I chose to create a special effects background using inks and a straw but it’s up to you what you would prefer. I then drew a rough white line around the background square, adhered the tree with a strip of ribbon as my trunk and a small ribbon bow for decoration!!
7. The background has been created by dropping small drops of Ranger Distress inks onto gloss card and blowing through a straw to make it spread. I started with a linen coloured ink then used a blue and finally dripped droplets of silver alcohol metallic mix onto the surface. The cool part was when the metallic mixative went on as it reacted to the water based inks and created a really cool effect I really hadn't anticipated!!
Sharon
So this is my Bow Tying Cheat!


 7. trim
 8. look how magnificent it looks!
 10. Start with your loop

 13. Go behind with it again
 14. Push through and pull.
 15. This is how I mess with my bow to get the desired "ears". I have it like held between pointer finger and thumb. and then I have the ends held between random fingers and palm.
 17. This is my secret part... I attach the bow with a glue dot or two.
 18. Attach to card and marvel at the great bow you've just made!

Hi everyone!
Here's a nice and fun technique you can make using your stamping supplies. To make this project, you will need:


 3.) Now for the fun part :) Grab the black kitty shape and with the Versamark damp the entire shape (top only).
 4.) Spread clear embossing powder on top, making sure it covers the shape entirely.
 5.) With the heat gun melt the embossing powder on the shape.
 Repeat steps #3, #4 & #5 for the remaining black pieces.
 Nice technique, ha? And it looks gorgeous!
 7.) Adhere dimensionals on the back of your pumpkin and center it on top of the black cat shape.
 8.) Now finish your card by adding eyes and nose to the cat and its paws. I used my circle punches (small & 1/4 size punches) to create the eyes... even better, you can add those wiggly eyes for a funner look.
 And we are done! Here's how it should look on the inside:
Acrylic paint, a light and a dark shade and silver
Glad Wrap
Scrap of sequin scrap
1. Cut card to size and coat evenly with your darkest colour. Leave to dry thoroughly.

 3. Tear of a piece of Glad Wrap large enough to cover the surface of your card piece and the edges by approximately 5 cm.
4. Scrunch the Glad Wrap onto the surface of the card. At this point any excess paint will gather into the folds of the Glad wrap. Leave to dry thoroughly.
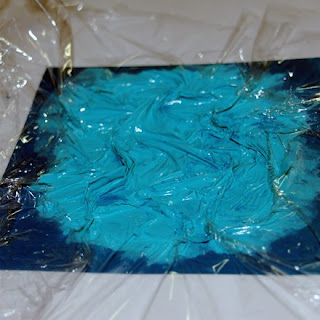
5. Once dry, carefully remove the Glad Wrap. At this stage you will notice that where the paint fell into the folds of the Glad Wrap, the paint is thinner or absent.
 6. Using the Sequin scrap and a balled up scrap of Glad wrap, sponge the silver paint over the sequin scrap to create a random patterning.


