Hopefully you'll be able to follow this tut and will be adding watermarks to your photos easily afterwards.
I am using PSP 7 for this tut, although other PSP versions will do this too.
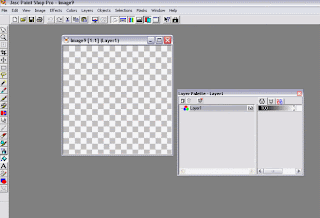
1. Open up a new image with a transparent background, mine measures 300 x 300 pixels.
![](https://blogger.googleusercontent.com/img/b/R29vZ2xl/AVvXsEjMtv9I_OnICIsnMcg8iEUxZAmpnHFemhW-rietNo49IokwqF-SJiXbiw1Qqj4DCb8tzqK-euCsO4NuuYCQy4UZKFDeOdE0_CHtxPJDgxUIN-PqvEuHa-5KKf5cTcjQdQKnsSz-JWZ5NSQ/s320/1.gif)
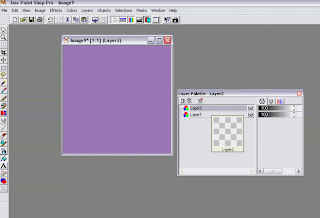
2. use the bucket fill tool to add a base colour (any darkish colour will do, this is purely to be able to see the actual watermark whilst working on your design)
or skip the above and open a new image with a darkish background (I always use a transparent image to start with so have transparent as default)
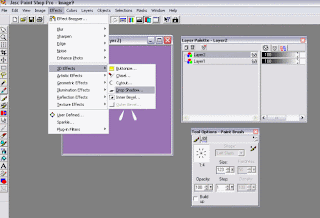
3. Add a new raster layer (Layers > New Raster Layer)
![](https://blogger.googleusercontent.com/img/b/R29vZ2xl/AVvXsEhohQxzd35ts_QwJMBdfu4MFQclWSzftk6-nCvmTezCSKpATGIkea5s892tlSNMMF63Wp5hvcs827qzT32rhEsw-mz4SAMlC9xQqiHQBEJvn9wMHQriqIiyKBmO-VMNv6Zx9J7xGZEYhec/s320/2.gif)
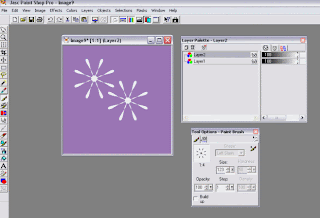
4. On Layer 2 (click on layer 2 on the layer palette to select) ... click the paint brush tool and select a background design from the list, I chose this skinny flower design and added 2 flowers
![](https://blogger.googleusercontent.com/img/b/R29vZ2xl/AVvXsEjilU_uOwMbaBL-hVEkF3Bi3DRrjpRAwlAfcjL3ktNnTbygPWjRYtLgi6TsHbYRo4yoSr-MJzu-fBTOtGG6MN0hyphenhyphenqz3-MVy3RFSf57mQvnNeog4_sHVYDP14Xgw8Y7tVC0ELizMIBDPKjw/s320/3.gif)
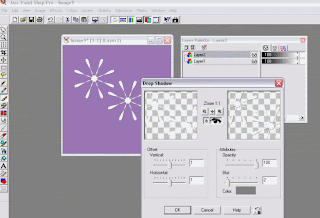
5. Add a drop shadow
![](https://blogger.googleusercontent.com/img/b/R29vZ2xl/AVvXsEi07CgtoBF32tX6azNOFmToXtdtWMmc3gcRwpqch2tgM0yKDAAsBefChboPWpsz8-yj9QMuK77kXqzX9v1koZn3zq3mpsK7R7qnvsBl7GonKAfQj8Qr7txFfP3q8Y3cn7rFbL5SiDy2G6U/s320/4.gif)
![](https://blogger.googleusercontent.com/img/b/R29vZ2xl/AVvXsEibK8UEY8WDzqz8x4_bGro4-tXy_KI_lx7yFgAv56gaUefpS7Kz7nvGzL3LMxB3SHVReSWoiqUraagfIUf7-l-XQuIZxdPh4VGV6QgbeIaTsUETCE1ndZWI7g4UShShyc81gr7VhhrLkv8/s320/5.gif)
6. Make the opacity less by sliding down the slider in the layer palette on layer 2 only, I took mine down to 30%

![](https://blogger.googleusercontent.com/img/b/R29vZ2xl/AVvXsEiCQZJr1X3PFSfbcA4WfeBkVNFYVQg1ETPHrP_Ntwr_HR7OtaFMmx8f26boHNszA5VXu5pdlS8wL3Cuzrsc7BxsexmkpbgWieHWDDPsdG0ou4mShXtWlPPEkRDSh1FlTzjuCj3QUuatq0w/s320/7.gif)
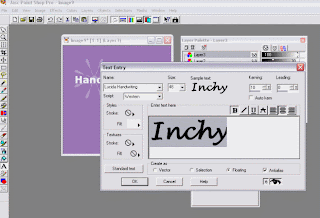
and on the same layer (layer 3) I added the word 'Inchy', but in a different font and bigger...
9. Take the opacity of layer 3 down to 60%
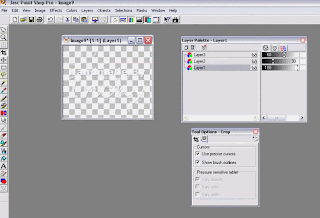
10. Crop around your watermark so that there isn't loads of space around it

![](https://blogger.googleusercontent.com/img/b/R29vZ2xl/AVvXsEgp-9fXyFc0mZLbZgzBGlJLBgPMpV6hnjAE4WZk7C2M3QaejnfYhJgMPKMch8NMpJZoxcY66B6Wrdjfx3ri7fybZmFPLg9ge1raA2IG5fl8ZvuuMqCsuDiDDoyCB5B7I29E9oWxEYOJoIk/s320/10.gif)
11. Now we'll get rid of the background colour, click on Layer 1 in the layer palette and then hit the delete button on your keyboard, the background should now have gone and you will have a transparent background again
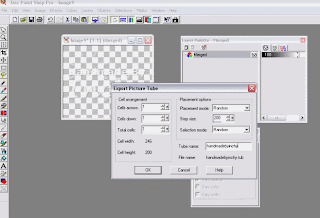
13. Make your watermark into a picture tube... (File > Export > Picture Tube)
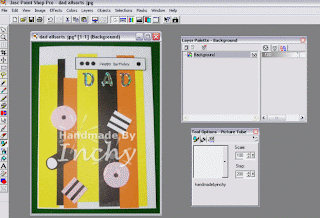
![](https://blogger.googleusercontent.com/img/b/R29vZ2xl/AVvXsEju6Yw21VMEpzlRd71TZmj7IW-LcF9Y2Y9OPKwEJ8IKFcj0p2wHihT1lWCKrhC66rNcqxAvUUXrohlUikDp45XF-2eGF7X2ICilpRJIP85L8sQpqXjBi-7Qnmz__r2iu5xZ24155ugLewY/s320/15.gif)
Her rates are very affordable too and she has the patience of a saint and is a really lovely lady to deal with :)