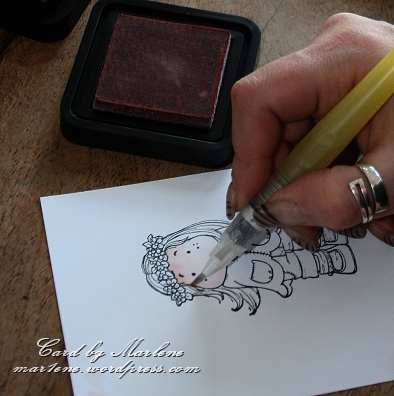
I have been asked so many times how I do my colouring with Ranger distress inks.. and thought to save me a whole heap of time explaining to everyone I'll write this tutorial.
This will describe how I use them, encouraging you to use your own style and creativity at all times! :)
Right.. first off.. get your materials ready. In this tutorial I am using the Ranger Distress inks pads, I have listed the colours as I used them. So, I've got my image, choose the papers I wanted to use.. to pick the colours for the image, a filled water brush (mine is koi) and that is it!

Lets get colouring!!.. I usually start with the lighter colours.. like the face and use 'Tattered Rose' colour for this.
Grab your water brush and dab/swirl it on the back of your 'non painting' hand, in between your thumb and forefinger.. I find that this gets the flow going and you can tell if the brush is too dry or too wet.. I also use my hand to wipe the brush so it is clear for the next colour.
Dab your brush onto the pad to pick up the colour and bring straight to the skin area of your image. Start at the hairline or darker shadowy bits of the area and drag it equally all over, at this stage I use a sweeping motion with the brush

Try and not get it too wet and a little goes a long way, you can always build up colour.. it is much harder to take it away.

Again take some colour from the pad and apply to the shadowy area's, you are now building the colour up to a shade you are happy with... I make more of a dabbing motion with my brush for this part. Once the face in particular is coloured and shaded move on to another area of your image, so it can dry.. we will add the blushed cheeks and details later.

Next I wanted to colour Tilda's jeans, so took the 'Faded Jeans' ink pad and as this is a much to dark a colour to add straight to the image, I dabbed the brush and then swirled some on a piece of scrap paper, or at the unused bit of the CS. Then paint the whole area of the jeans again really dragging the colour from the edges to the middle, using the sweeping motion.


Work your colour again and again, always using your scrap bit of paper to get the darkest colour of your brush, then dab around the area's you want more shading.. sometimes, when you drag your colour in smaller areas, a drop of water will lay on your paper as you take your brush off, I quite like this effect.. but if you don't, you can always blend this darker bit by drying the brush.
as you can see i got quite a definate line on the second picture above.. as I wanted to show you that you can blend this easily.. when you ready to blend, swirl the waterbrush on your hand again to lose all the colour from the tip.. then go over the line and drag to the middle of the area.. the water will do it's job and blends the line!
have a look at how I build up her shoes:


Oohpsy, made a mistake and gone outside the line?

This can also be corrected by going over it with a clear brush.. swirl your brush on your hand, go over the mistake from the white inside to the line and it will dissapear like magic!! just have a look at the first picture below, its all gone :)
Next it's Tilda's top.. I have used 'Spiced Marmelade' for this.. work this in the same method as described for the jeans by dabbing the darkest colour onto scrap paper, light colouring, sweeping all over and dab the brush onto the parts to be shaded, blend with your brush (cleaned).


While I've got the spiced marmelade in front of me, I dabbed dark orange onto the centre of the flowers in her hair and really light onto the petals

Onto the hair, love this bit :) .. I've used Antique Linnen all over and gone over it again in the shaded places.. then added a darker shade, Frayed Burlap for the hairline and accents, and lastly an even darker shade 'Brushed Corduroy' for the bits I really wanted darker.. I've also used this shade to give some shadow by the neck and coloured the buttons of the top, I then took the green 'Peeled Paint' ink and coloured the leaves..

ohhh... nearly done, just some finishing touches..
I wanted her cheeks to be a little more rosey.. so got the tattered rose inkpad again and made small circles where her freckles are, again if the lines are too obvious, wipe your brush clean on your hand and go over the lines to blend..
To finish off I took my white painter pen and added some dots on her face and lines on top and shoes to give the appearance of a glow
This is my finished picture

.. Oh.. and you might have to wash your hands, or you'll be walking around with ink smears for the rest of the day! lol
I really hope this tutorial is of some help and use to some of you.. and ofcourse if you have any questions or comments, please contact me anytime!
Marlene xx
A note from Julie
WOW what a great tutorial and I'm very happy to welcome Marlene as a contributor to this blog she is one talented lady and I have admired her work for a long time.
Click HERE to visit Marlene's Fantastic 'A Lil Bit of Me' Blog