Wednesday, 27 February 2013

Re-purposed Pin Cushion

Hop on over to my blog, Twisted Figures to see a tutorial on how to make this pin cushion out of a  Valentines Day box. -Shonna


Friday, 22 February 2013

Would you like to contribute to this blog?


Thank you to everyone that has contributed to this blog so far and to everyone who visits every day, links here from their blog and of course a huge THANK YOU to the lovely followers of this blog

If you have any Tips, Techniques or Tutorials to share please contact me

You will become an author of the blog and can contribute as and when you like, I only ask that you link back to your own blog or website so that others can find you if they have any questions

All contributors can put the Contributor button above on their blog or website

If you have any questions don't hesitate to contact me at tipsandtutorials@gmail.com

Julie Allain :)

Saturday, 5 January 2013

Rose Posy Picture so 'Chic'.


Rose Posy Picture so 'Chic'.

Today's post is going to be about using some of those beautiful flowers that we sell at Craft Fairy in a picture frame. I've made this because so many of my customers say that our flowers are too beautiful to use and they keep them in a draw to look at from time to time. Well we cant have that can we. So this is how to get them out of the draw and use them to good effect.

Do you like this frame? Does it look expensive? Well, it actually cost me 99p and it came from the shop of the same name. You probably have a local one yourself so get on over and have a look at what they have in stock. There was no glass. What did I expect for 99p? Better for the purposes of making this picture.


The paper is from Making Memories and was part of my stash that I'd been keeping for a long time as it was too pretty to waste.


 Cut the paper so that it fits on the backing board. Fix it in the frame.

For the posy, I used a selection of flowers.

Large curly roses in pink.
Vintage blue roses in blue

Shape your roses so that they form  round shape as seen in the image. Then apply foam pads to the back of the posy.


Stick down onto the backing paper.

To make the vase cut a vase shape from some decorative card. I used some non shed glitter card but you could use any toning card that you have.

Tie a knot in a piece of 16mm ribbon. I used french blue,  and trim to make it look like a bow. Apply tape to each side of the ribbon and tape to the back of the vase shape.


Now attach this to the picture with more foam pads and your picture is complete.

Wednesday, 19 December 2012

Shabby Chic Lace Flower Tutorial

This is so easy, it practically makes itself.

Shabby Chic Lace Flowers are really hot at the moment so this is my tutorial pick for today. It's a video tutorial for a change. If you click the image you will see the video.


I was inspired to make this flower as www.craftfairy.co.uk is now stocking this fabulous pointed lace. I believe that it is leavers lace. That is the same type of lace as the one used on Kate Middleton's wedding dress.


Apart from the lace, you will need a needle and thread and a flower to put in the centre. Please see my video on making folded flowers to see how to make one for yourself.
Lots more tutorials on my own blog.


Monday, 24 September 2012

How to Make Halloween Eraser Magnets

Hey all, this is angie from Desperate Houselife. This is a super easy tutorial I originally posted in 2011, but I figured i’d share it anyhow for Halloween.

This is a super easy tutorial, but I figured i'd share it anyhow. I made Halloween magnets from erasers I bought at Dollar Tree. They are cute and cheap home decoration, or gift ideas. Spookify your fridge, hand them out in lieu of candy, or give them as favors at a hosted Halloween party. Fun!
Materials: Magnet, Super Glue and Erasers. I Bought A 12-pack of Magnets at Dollar Tree.
Cut the magnet comparable to the size of the magnet and Super Glue it to ensure that it holds. I find the regular magnet adhesive to be lacking in strength. The smaller you cut, the less it will hold on your fridge.
Put those babies up and coo at them.

Friday, 24 August 2012

Owl Bookmark Or Treat Topper Tutorial

I'm not sure what all the hype is with the owls lately but I was again wasting my time on Pinterest and came across these cute bookmarks.  I have my monthly stamp club swap coming up and our challenge this month was to create something other than a card.  So I thought I would make these and show you how easy they are too.  

We only had to make one thing per person in my stamp club and that totaled 7 of us. But since these can be used as treat toppers or bookmarks I made six for everyone. 


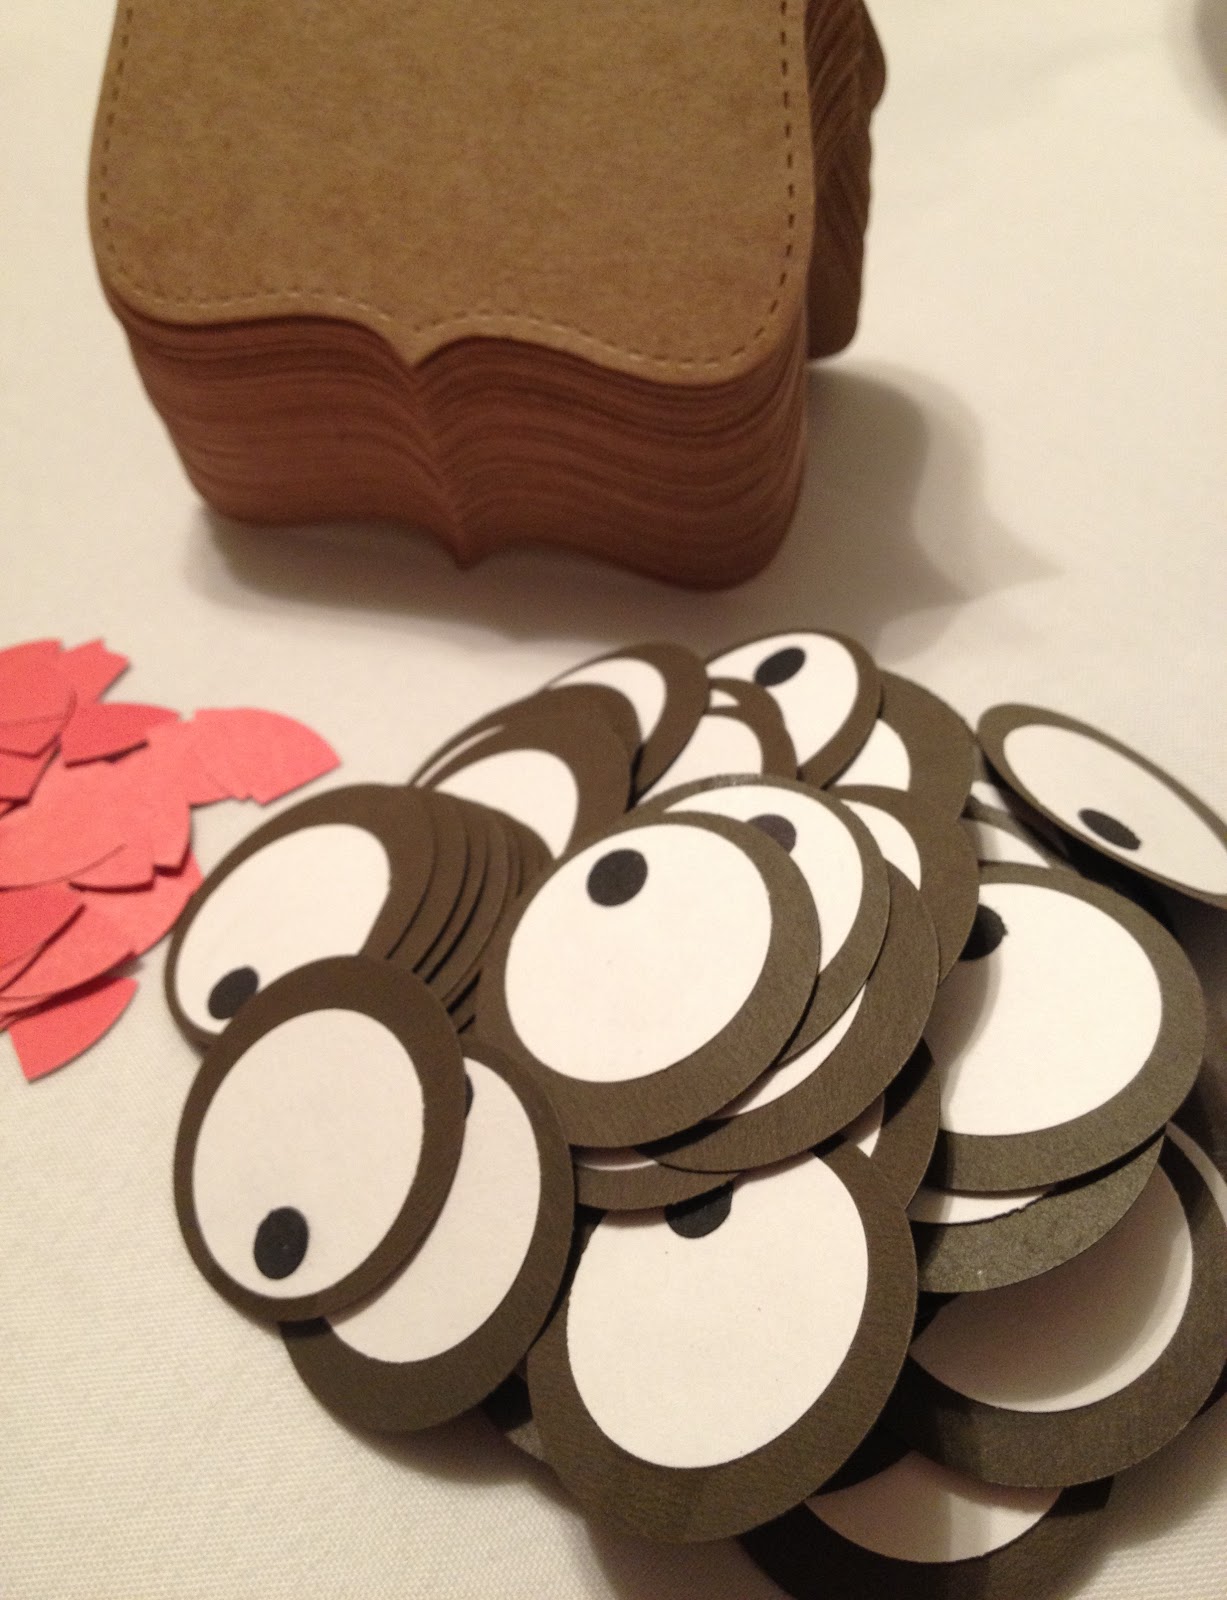
Let me break down the amount of things I had to punch out just because it's ALOT!  Oh and here's where the how-to comes in.  I used a Sizzix Top Note Die for the base and I needed 42 of them.  Thank goodness for my Big Shot on that part!  You can also just cut a piece of cardstock at 4 1/2 x 3 1/2.  

Then you need circles (2 of each) cut at 1/4 inch, 1 inch and 1 3/8 inches.  For me that amounted to 252 HAND PUNCHED CIRCLES!  Ok, got a little excited but if I didn't have carpal tunnel before, I have it now.  I also used a five petal flower punch and just used one petal for the beak.  See the picture below for everything you need then just assemble it together.  Easy peasy!  
Have fun!


Thanks!  Monica

Thursday, 14 June 2012

3D Stamped Card/Project Tutorial


Good Evening Everyone,

My name is Fiona from feeleedesigns.blogspot.com.au I have recently been given the pleasure of contributing to Inspirational. To start off I am posting a tutorial I did for a 3D stamped project that I completed.

This tutorial gives you a step by step guide on creating 3D stamped images for your cards or projects. For this particular piece I have used a La La Land stamp Kitty Kat Marci.

STEP ONE:  You will need to stamp your image a number of times. For this project I have stamped my image four times in total.  (Three stamps I used to colour for my pop up areas and these will be cut up and the last stamped image I used for the base of my stamp). If you are using digital stamps then print your image a number of times.  To begin with you will need to colour the areas on your stamp that you wish to raise and have popped up, these areas will all be cut out.  This is shown in the photograph below.


For my first areas I have coloured the hat, top and skirt on Marci.


For my second areas I have coloured the ears and crosses on Marci's Hat, the details on her shirt, shoes and the flowers centre.


For the final area to be raised on my stamp I have coloured the flower.


STEP TWO: Once you have coloured each area that you wish to raise you then need to cut them out. This is a little time consuming however it is absolutely worth it as the end result looks wonderful. You can either fussy cut with scissors or you may like to use a craft knife. I prefer the scissors, however it is personal preference.


STEP THREE:  For the base of the image which is the fourth image stamped you then need to colour the rest of Marci these areas are what will remain flat and will be the base for which you will stick the pop up pieces. So in this case I coloured her hair, face and her stockings.  You will notice that I have then coloured all the other areas black.  This is the base for my pop up areas. I have coloured them black as it gives a more finished and professional look when the image is all finished.


This is a close up look of your main completed base stamp of Marci and how it should look just before you are ready to assemble and stick all your raised coloured sections on.


This is what you should start with when ready to stick all your pieces together. To complete your project each cut out coloured area is then stuck on your main completed stamp. 


This is Marci all stuck together. I find zots glue dots the best option for this project. However you can use what you have available. Any 3D glue or sticky dots will work fine.


A close up view of Marci raised. I have cut her out completely to finish the stamp off nicely.


STEP FOUR: Its now time to assemble your completed project on card stock or whatever you wish.  I have chosen to do a sweet little note book for my daughter.


For my completed project I have chosen a blue, red and lemon colour scheme. I have sewn my papers together and used red, white and lemon flowers, blue satin ribbon, pearl accents, a smile embellishment and red brads to complete the notebook!


Thank you for taking the time to share my tutorial. I hope you like it!  This is particularly fun to do and the end result is so cute! If you like what you see if you could please take the time to leave a comment on my blog that would be wonderful! Have a great weekend and I hope you stop by soon.


xxx
Hugs

Fiona xxx