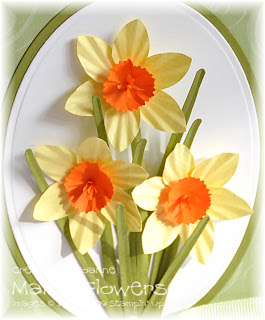
Here is how I made the daffodils on
this card.
You may like to refer to this post if you haven't seen it before -
Tool SubstitutesAs usual - click on any picture for a larger view.

Here's the list of items needed to make a daffodil:
- Scraps of yellow and orange paper
- Green card
- Moulding mat
- White pva glue
- DEET tool
- Embossing ball tool
- Character shaper
- Pencil
- Scissors
- Deckle edge scissors
- 5-Petal Flower Punch
- 1/2" Circle Punch
- Boho Blossoms Punch

Punch out two 5-Petal Flower shapes, one of the largest Boho Blossoms shapes and one 1/2" circle.

Using the scissors, cut out one petal as above.

Continue cutting off the petals as with the first one until they are all separated. To make one daffodil, you will need six petals, so cut one petal from the second flower also.

With a petal on the moulding mat, and using the DEET tool, place the needle end flat on the petal running from the base to the tip. Apply pressure and draw the needle along the petal towards the tip, all the time keeping the tool flat against the paper. Now do the same thing once on each side of the central line, and make these lines fan out from the base of the petal to the edge. Turn the petal over, and make some more lines in the same way, between the ones already made. Repeat on all of the petals.

Draw a dot with the pencil in the centre of the 1/2" circle. Hold the petal by the tip, and dip just the very point of the base into a blob of pva glue on a scrap of paper.

Stick the petal on to the circle, with the point of the base in the centre. Stick on two more petals in a triangle arrangement.

Now stick the remaining three petals on top, evenly spaced between the first three.

Using the deckle edge scissors, cut the tips off the largest Boho Blossom flower all the way around.

Cut a slit from the outside to the centre.

Using the rounded end of the Character tool, and light pressure to begin with, emboss in circles - around the edges first, gradually working your way in to the centre.

Where you have cut the paper, the two edges will slide over each other - as indicated by the arrow. Place a tiny spot of glue between these overlapping edges, and stick together to hold the cup shape.

Place a small spot of glue in the centre of the yellow petals, and place the trumpet on top. An embossing ball tool is handy for pressing the two layers together. Make sure that the trumpet settles in an upright position.

Cut a small rectangle of orange, and at one end cut about 7 narrow strips to make a fringe. Cut away the rest of the rectangle from beside the fringe as above.

Beginning at the fringed end, roll the paper tightly. Here I am using a quilling tool, but if you don't have one, you can use the needle end of the DEET. Place a spot of glue at the end, and continue rolling and stick together.

Trim the rolled base so that it is a couple of mm long, and also trim the fringe if necessary to make it about as long as the trumpet is deep.

Dip the base of the stamens into the blob of glue on the scrap paper, and then stand upright in the centre of the daffodil. Once you are happy with the position leave to dry before gently spreading the stamens a little. If you try before the glue is dry, they will come out!

Cut slightly tapered, narrow strips of green card to make the leaves. Round off the top, narrow end. Then use the DEET tool in the same way as for the petals, to make a crease down the centre of the leaf. The flower stalk is made in the same way, but just cut a slightly longer length, and don't taper it. No need to round the end as it will be hidden behind the flower head.

Stick the stalk on to the back of the flower as shown.
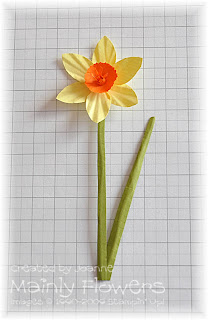
The finished flower.
On my card, I made three flowers and a few leaves, which I arranged at different levels. I stuck them down to the white oval and then trimmed off the excess length from around the bottom edge of the oval before sticking it down to the matting.
 My blog Mainly Flowers



 Cuttlebug folder: I like the Textile folder for this


