
Tuesday, 30 March 2010

Sunday, 28 March 2010
A Butterfly Easel Tutorial
by Debbie Dolphin
Hello
I keep being asked how I made my Butterfly easel card,so I thought here would be a great place to do so.
Firstly you need a butterfly template. Draw one on a single white card and then draw another on a pre-folded card like in the picture. Note that the top of the wings are slighty hanging over the fold as this is where he card will open.
 Carefully cut out and fold in half like the picture below.This is going to be the easel panel which will hold the main butterfly which we decorate.
 The single butterfly will then be attached to the easel panel, but only at the bottom half. Personally, I prefer to decorate it first then attach it to the panel
Hello
I keep being asked how I made my Butterfly easel card,so I thought here would be a great place to do so.
Firstly you need a butterfly template. Draw one on a single white card and then draw another on a pre-folded card like in the picture. Note that the top of the wings are slighty hanging over the fold as this is where he card will open.
 Carefully cut out and fold in half like the picture below.This is going to be the easel panel which will hold the main butterfly which we decorate.
 The single butterfly will then be attached to the easel panel, but only at the bottom half. Personally, I prefer to decorate it first then attach it to the panel
.
Then it should look something like this.

and decorate with papers,rubber stamps,flowers etc.

Here for the paper flowers I punched out three different sized blossom flowers,scrunched up and added embellishments for the centres.Then I distressed the edges used Victorian Velvet distress inks.
 To see more easel cards please visit my BLOG
By Debbie
It would be lovely to read your comments

Then it should look something like this.

and decorate with papers,rubber stamps,flowers etc.

Here for the paper flowers I punched out three different sized blossom flowers,scrunched up and added embellishments for the centres.Then I distressed the edges used Victorian Velvet distress inks.
 To see more easel cards please visit my BLOG
By Debbie
It would be lovely to read your comments
Thanks xx
Wednesday, 24 March 2010
2 Step bird rose bud.

You'll need: 2 way glue pen, red and green card stock, 2 step bird punch, post it notes.

You'll need to punch one whole punch in green and also one wing shape in red,

Using a post it note attach the green bird to the sticky edge so it makes it easier for you to slide the bird back into the punch,

slide the tail of the bird into the wing shape of the punch, you might like to lift the very tip of the tail out of the punch so you don't cut it off then use the punch to create a bud shape,

you'll be needing these three pieces that you have punched, the red wing the green branch and the green tail piece,
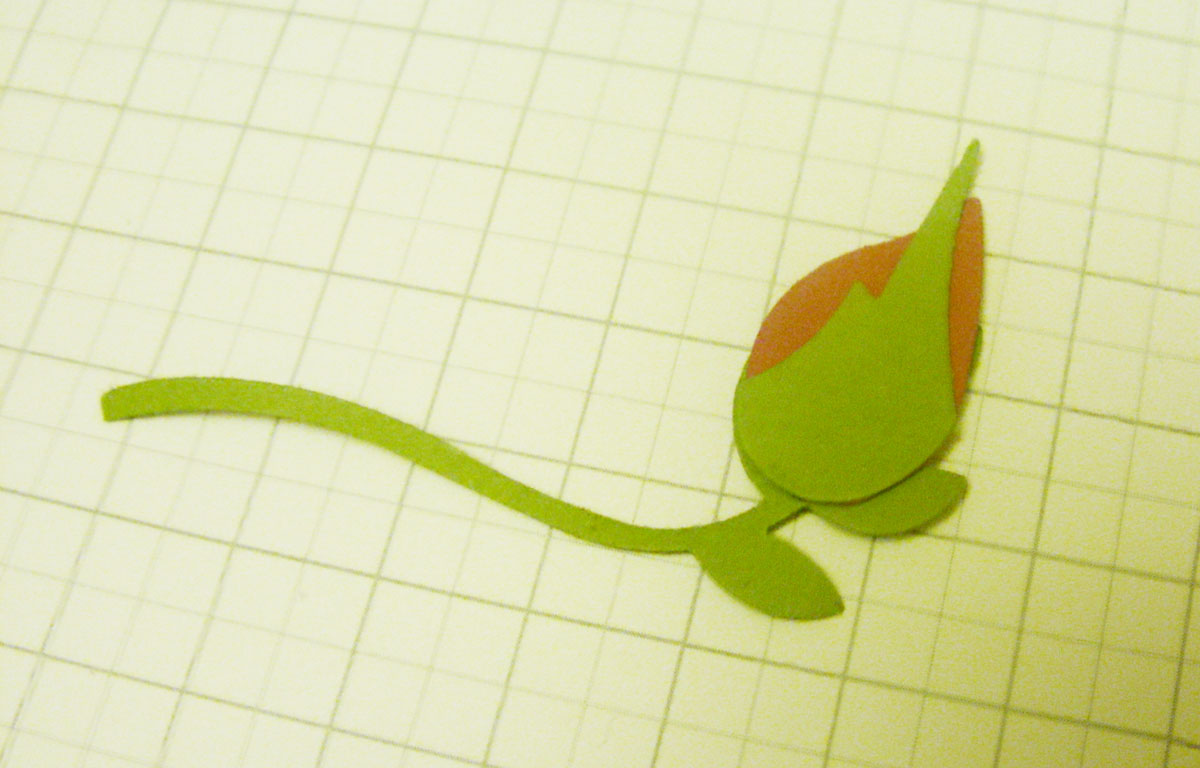
Using your 2 way glue pen stick the green tail on top of the red wing then layer this onto your green branch, now you have a tiny rose bud!
These roses look gorgeous if you use a sponge dauber to add some depth around the edges of the punched pieces.
Thanks for checking out my tutorial,
you can see more of my tutorials and work here on my blog
Abi
Friday, 19 March 2010
Decoupage using a Digital image
Decoupage is still very popular and can be done easily with rubber stamps. You can also decoupage with Digital images. This tutorial will show you how to do it easily.
The image I have used is Whimsical Girl Heart Garden from Bee Crafty.
This is part 1 of a 2 part tutorial ( both parts can be done on their own though)
1. First I printed the image 4 times using Photo Printing Wizard onto good quality white cardstock ( about 250 gsm)
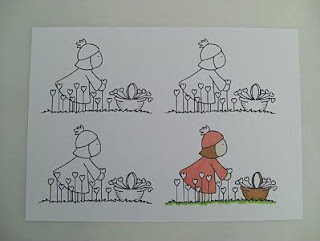
2. I then coloured one image with my Promarkers. My 2 main colours are Mango and Bright Green. This isn't necessary as this is the base image which will be layered but I think it gives a more professional look.
3. I then cut out the image, in this case using a Nestability die.
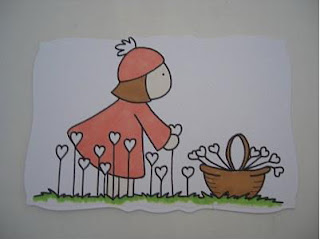
4. I have then coloured and cut out various parts of the image from the remaining 3 images.
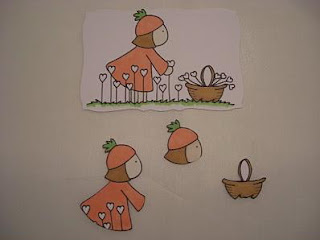
5. Here is a close up of the cut out images.
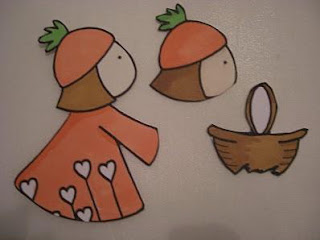
6. If you don't have many Promarkers and want to use shading on your images you can go over your colouring with the same colour to deepen it. In this case I have gone over the Mango with the same Mango pen on the left side of the image. I have done the same with the Bright Green. This will give the shaded effect
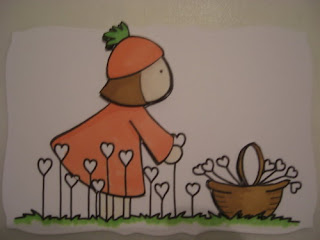
7. I have layered the pieces on top of each other with foam pads.
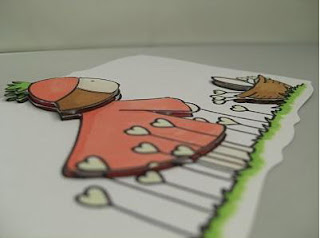
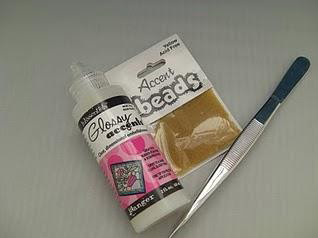
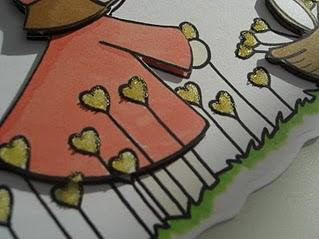
8. Next I have used Glossy accents over the heart shape flowers and sprinkled tiny yellow accent beads. The Glossy accents is clear and will act as a glue to hold the beads in place.
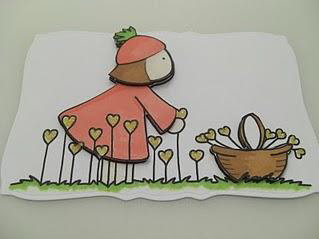
And there you have a decoupaged image made from a digital image.
I would love to read any comments you may have
Love Sarah XXX
you can see more of my work here sarahwrightdesigns.blogspot.com
The image I have used is Whimsical Girl Heart Garden from Bee Crafty.
This is part 1 of a 2 part tutorial ( both parts can be done on their own though)
1. First I printed the image 4 times using Photo Printing Wizard onto good quality white cardstock ( about 250 gsm)

2. I then coloured one image with my Promarkers. My 2 main colours are Mango and Bright Green. This isn't necessary as this is the base image which will be layered but I think it gives a more professional look.
3. I then cut out the image, in this case using a Nestability die.

4. I have then coloured and cut out various parts of the image from the remaining 3 images.

5. Here is a close up of the cut out images.

6. If you don't have many Promarkers and want to use shading on your images you can go over your colouring with the same colour to deepen it. In this case I have gone over the Mango with the same Mango pen on the left side of the image. I have done the same with the Bright Green. This will give the shaded effect

7. I have layered the pieces on top of each other with foam pads.

8. Next I have used Glossy accents over the heart shape flowers and sprinkled tiny yellow accent beads. The Glossy accents is clear and will act as a glue to hold the beads in place.


And there you have a decoupaged image made from a digital image.
I would love to read any comments you may have
Love Sarah XXX
you can see more of my work here sarahwrightdesigns.blogspot.com
Sunday, 14 March 2010
mini minialbum idea

I bough some Puma college pants. Puma products has this information thing were is size, prize and all kind of information. It was on my desk and I was going to throw it away when I got an idea. I do a minibook I mean real mini..:)
I just cover it with designer paper and I'm going to decorate it later and meaby but it into my bag as a keychain.
So here is my mini minialbum almost finished. I just trace all lines into designer paper and tape those down.
I used Cosmo Cricet Earth love collection papers for this project.


I hope you like this fun idea that I figered out..
Happy crafting moments.
Mirja
Friday, 12 March 2010
Soap bubbles backgrounds
Hi, this is Cuchy.
My son David and me would like to show you how we create backgrounds with soap bubbles. Hope you like it. Thanks for your visit.
If you'd like to see more of my work, please visit me at Hecho a mano
My son David and me would like to show you how we create backgrounds with soap bubbles. Hope you like it. Thanks for your visit.
If you'd like to see more of my work, please visit me at Hecho a mano
Thursday, 11 March 2010
A Corsage from Paper Flowers
Recently, at Craft Fairy, I've taken delivery of a large number of fantastic paper flowers and they are too wonderful to leave untouched in boxes until they sell. So I've decided to put my floristry training into practice and show everyone how to use the flowers to make a corsge.

 Then I layered the smaller roses as shown below. Start with the smallest flower at the top and gradually wor down to the largest of the three.

Now twist the stems together.

Add some glue to the base of the leaf .


Repeat the same steps with flowers and leaves for the other side. Lay them on the table and cross over at the centre point.

Put the large rose in the centre and then twist the wires together at the back of the corsage so that they lie flat. At this point, this is what you'll end up with.

Set out what you need to start with:
First of all I cut the green flower in four as seen below.
 Then I layered the smaller roses as shown below. Start with the smallest flower at the top and gradually wor down to the largest of the three.
Now twist the stems together.

Add some glue to the base of the leaf .
Glue behind the flowers as seen below.
Repeat the same steps with flowers and leaves for the other side. Lay them on the table and cross over at the centre point.
Put the large rose in the centre and then twist the wires together at the back of the corsage so that they lie flat. At this point, this is what you'll end up with.
However, I decided that it looked a little empty in the middle so I glued some green petals behind the central flower and I was happy with the way that it looked.
 Lots more inspiration on my
Subscribe to:
Posts (Atom)