A few people have asked about my blending technique when using distress pads, also about the basic tools needed for this. So here is a little guide to get you started with the distress pads and blending if you have not dabbled with it already. This is just one of probably hundreds of tutorials out there on blending inks, i thought i'd stick this one up just incase you haven't found the others yet.
.
May i add that i have not been doing this for long myself, this guide is mainly based upon my own experience of working with distress pads and what i have learnt from others, so your experiences may indeed differ or be of more use.
Ok, distress ink pads. The most common ones used (may be the only ones in fact) are the Tim Holtz Ranger Distress Ink pads. These are acid-free, non-toxic, fade resistant, water-based dye inks. Ideal for many projects and can give a great "aged" look to a project. There are 24 colours in this particular range.

These have so many uses, people even forget sometimes that you can use them for stamping, but this is about blending so i'll move on. Remember though, waterbased also means they can be affected by water. Sorry if that sounds obvious, but when i said you could use them for stamping, they will not be as permanent as solvent based archival inks and the likes.
If at all possible, see the ink pads in person if it is your first time choosing colours. Maybe someone can show or send you samples of how the colour looks on card before you choose and buy. This reduces the risk of you spending out on colours that you are not too keen on once you start using them.
Another thing, don't just take the lid off in the shop and go by the colour of the ink pad. Often the pad looks different than the colour it produces.
Tools for applying the ink:
For the best results, i find it better to use the proper tools for the job. These can however be improvised upon if you do not have the tools available. (I'll talk about that later).
Firstly you will need an applicator tool and blending foam.....

Notice i said "
blending foam". There are also "
blending felt pads", however the felt pads are used more for alcohol inks, for the technique i am describing, you need the foam pads.
These pads are foam on one side, velcro on the other. They just stick nicely to the velcro on the underside of the applicator tool. Easy as that!
Remember, do not throw away the pad once it has been used, as long as you use it for the same colour, it can be used again and again until it gets worn.
As far as tools are concerned, thats all you need to blend distress inks.
Right then....cardstock/paper. As far as i am aware, it does not make too much difference whether you do this technique onto cardstock or paper. I've used the ink on many different weights of card/paper and it works fine on all so far.
To apply the distress ink, dab your foam pad into your ink pad. With practice, you will get to know what is too much or too little. Some colours are stronger than others, in which case you may want to dab the freshly inked foam pad onto a scrap piece of card to get rid of some of the ink. Remember, you can always add more, but to remove a thick wet amount of ink is a lot harder.
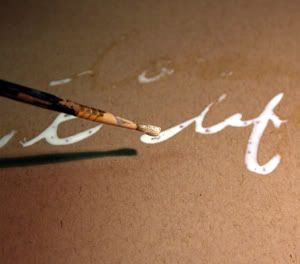
To start the technique, you need to have your applicator tool and pad at an angle to the piece you are going to ink.....also, do not start directly on the card, start off of the card.....this ensures you hit the card blending.

This will ensure that you hit the card blending. You can see from the pic below, my ink starts
off of the card and continues to wherever i want to blend up to. You do not have to start quite so far off the card, i've just done this so it's easy for you to see. Tip: Some people like to use a non-stick mat under thier work so that the foam slides esily across it and onto the card you are inking.
.
So off you go, keep stroking your foam pad towards the card, take it off once you're on the card and then return to the start point off the card. Hold the card with your other hand to keep it still. I find it better to place the holding fingers close to where i am blending, as this stops the tag creasing from the pressure of the pad when you stroke over it.
For an excellent demonstration of how this technique is done, i would suggest watching a very talented guy called Dan make this tag on his blog....the video not only shows you blending, but how to use masking with the inks too. A very helpfull tutorial indeed.
.
Here is an example of a very basic tag i did for the purpose of this guide. The photo shows where i have used four colours, red, blue, green and yellow. I have purposely left the ink marks on the outside of the tag to show you the direction i blended from. Gradualy work each colour into the one next to it, so you lightly overlap it. The colours will blend into each other if you don't have too much ink on your pad.

Basicaly i just came in from each corner with a different colour. The image was stamped on before i blended, just ensure the stamping ink has dried before blending over the top of it.
*Note, the "red ink" on the tag is a good example of where i had a little too much on the foam pad. It has not blended so well with the yellow to the left of it.
Here you can see i have used lightly blended the edges with a purple ink..

If you like, you can add another effect by either spraying the tag with water using a mister for an even mottled look, or flick drops of water for a random and more obvious effect. For best results, apply the water drops/spray whilst the ink is still fresh. If the distress ink is allowed to dry, it does not have as much of an effect.
So there you are, a simple introduction to using the blending method with distress ink. I found that the secret to getting the blended look, is to just keep on going with the foam pad until there is no ink left on it....then keep going, even the empty pad will blend the ink nicely.
For those who do not have the applicator tool and blending foam pad, another option is to use your chalking tool and some cut "n" dry foam which you can buy in A4 sheets. (Thanks for this tip Maddy).
Cut a small square and grip it between the teeth of the crocodile clip...
This is not quite as good as the proper applicator as it is not as firm and has a smaller surface area (in my opinion anyway), however it is better than nothing if you have no tools. You can also use this method for more detailed blending.
Regarding technique, i have seen some people use circular motions with the pads when applying the inks, so maybe try this too and see what you like. Ensure though that you keep the pad angled as this eliminates marks caused by the edges of the pad. That said, once you have barely any ink left at all on your pad, you can get away with using the flat surface of your pad, but go carefull....you can easily mark your work like this.
Lastly, a neat little project for you to house your foam pads ready for the next blending session.....a foam storage chest!....heres the one i made...
So easy to make, just a few matchboxes stuck together, ink the fronts to correspond with the pad inside, and wrap a length of card around it to hold it all together. Decorate as you desire. I got this idea from a lady on a craft storage site, heres her post about how to make one....
Thanks for looking, i hope this helps anyone who is new to blending distress inks.
Happy blending! :)


 4.Here's the patterned paper folded and inked along the edges.


 6.Tie the ribbon through the holes and make a bow. Then decorate the front of the card.
 7. Now you can create a bookmark for the inside of the card. Cut a piece of matching cardstock
 8. Place the bookmark inside the card. If you like ,you can tape a gift card on the back of the bookmark :o)