Here's a simple tree made from a square scallop punch. So easy for Christmas cards or scrap books.
Scroll down for the video.
Scroll down for the video.

Don't forget to visit my blog for more fun too!



 Some ladies were asking how I made the CD Ornament in one of my blog posts, so I decided to make a tutorial to share with all of you.
 1.Using the CD as a template, cut out 2 circles with the patterned paper.
 2. Sand over the top of the CD so that the patterned paper will stick to it better. Glue on one piece of the patterned paper to the CD.
 3.Cut some ribbon into 2 inch strips.
 Now comes the bit of a tedious part. You will need to do a few pieces of ribbon at a time and glue them to the CD.
 5. Fold the piece over and glue together.
 They will look like this.
 6. My other scrapbook supplies helped me out! What darlings! I made a few at a time and put the pieces under something for the glue to set a bit. If you use a hot glue gun, then the process will go faster :O)
 7. Then put a line of glue on a section of the BACK of the CD and start gluing the pieces down.
 It will look like this on the FRONT of the CD.
 And here's my trusty stapler sitting on a few that were glued down to help them set and stay put!!
 This is what it will look like on the BACK when all the pieces are glued down. If you get to the end and there's not quite enough for another piece of ribbon, either move some around a little to make it fit OR move them apart to fill in the gap. Depends on the amount of space you have left.
 And here's the front.
 8. Cut another strip of ribbon and loop it and stick it down as well. Then take the 2nd circle you cut and glue it down to the back of the CD.


2. Next, use your nestability Oval scalloped die to cut out 4 ovals. Run each through an embossing pocket – I used a cuttlebug Xmas Snowflakes one!!
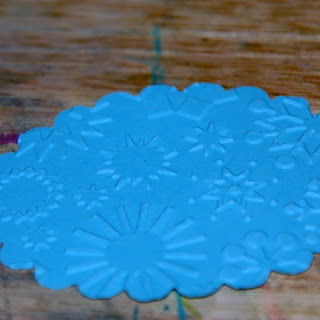
3. Once embossed, rub a white ink pad over the top of the raised section of each scalloped oval then a co-ordinating ink pad over the edges.

4. Adhere each of the oval over each other, ensuring a ¼ inch offset.
5. Finally, ensuring your oval set is laid in front of you in portrait style, mark the centre top of the bundle. This will be your cutting point for the 2 cuts you will make. Next, mark 2 radiating lines from this point, you should end up with an upside down cone shape and cut. Turn around and your tree is complete.
6. It’s now up to you to complete your card. I chose to create a special effects background using inks and a straw but it’s up to you what you would prefer. I then drew a rough white line around the background square, adhered the tree with a strip of ribbon as my trunk and a small ribbon bow for decoration!!
7. The background has been created by dropping small drops of Ranger Distress inks onto gloss card and blowing through a straw to make it spread. I started with a linen coloured ink then used a blue and finally dripped droplets of silver alcohol metallic mix onto the surface. The cool part was when the metallic mixative went on as it reacted to the water based inks and created a really cool effect I really hadn't anticipated!!
Sharon

 Step 2
Chop up the papers randomly, into little bits.
 Step 3
Bend the wire into a loop and twist the end inch together.

Step 4
Stick the end into the bauble
 Step 5
This is the messy bit. Start by handing the bauble from something, then gradually cover the surface in your gluey paper.
Take your time, and allow the paper to soften if it's too stiff to work with.
 Step 6

It also works quite well without the wire. Here are some I made using mullberry paper and some gold thread which look quite effective arranged in a bowl.
A
A note from Julie : Thanks for a great tutorial Anna !! For further inspiration check out Anna's Marmadaisy Blog HERE



 How it's made...


