Thursday, 12 August 2010

Gift Bag Making

Today the lovely Arina from Arina's Card Corner has accepted to share with us her wonderful "Gift Bag Making Tutorial".  Here's how it goes:


Hi everyone here I am again with a post I saw yesterday on you tube a movie about how a bag can make an envelope.

So I thought to myself I'll also try to make an attempt to make the end I made two.

I have for you like a workshop, I explain step by step with pictures how to make the bag.
'm Curious what you think.

Workshop:
What you need an envelope, ribbon, designer paper, 2 brads, colored and afdrukjes.


Step 1: First glue the envelope shut, and then cut out of the sides about half an inch off.
 
Step 2:


then go on creasing 1.9 cm on both sides and the bottom is 2.5 cm.  Then you fold the crease lines here, but does so as well so you get a tight fold.


Step 3: then go on top briefly with a cartel scissors cut a piece off so you get a nice edge.
 
Step 4: Then you just run your hand into the bag and fold the crease lines on the sides and bottom and that should it look like.


Step 5: then make 2 holes on the sides of the ribbon, and then create the ribbon on your bag.


Step 6: Then decorate the front and back with the design paper, if you did go down the bottom flap so they stick.

And after you tie the ribbon around it, so the base of your bag ready and you can further decorate it yourself.

And below you see two of my creation programs I made.

1 it was made for a mother of a friend who is sick hyves.

You can do everything in, I've even made matching cards with which you have money, gift etc can put.


***************************
Arina has many other wonderful ideas over at -->her blog<-- that you might want to take a look at ;-)

How I made my Apple :)

Hi All Friends...it is nice I can writing in here again....

Today I have a tutorial how I made my Apple for my card.

First I try to found my stash red and green cardstock from my "stash Paper" box :)

Found it and I collected my "Apple" and "Leaf" Hand Puncher together from the drawer :)


Now I draw the APPLE with red copic and the leaf with my normal green Pen (also the stem) oops so sorry not so great Pict...I mean I am not so good in Drawing :) but at least you can see this is an Apple :)


Punched so many little Apple and little Leaf and collect it, also made a Stem for the Apple with brown paper.


Then I adhere all the LITTLE Apple to the BIG Apple and the LITTLE Leaf to the BIG Leaf. Oops so sorry again not so nice Pict...(no sunshine today :( )


Also this is the whole Apple I have finished


This is my whole card :)


Thanks for looking my tutorial...


I hope that you found my tutorial is useful.

If you like to see more project or cards please take a peak to my BLOG :)

Love,


Tuesday, 10 August 2010

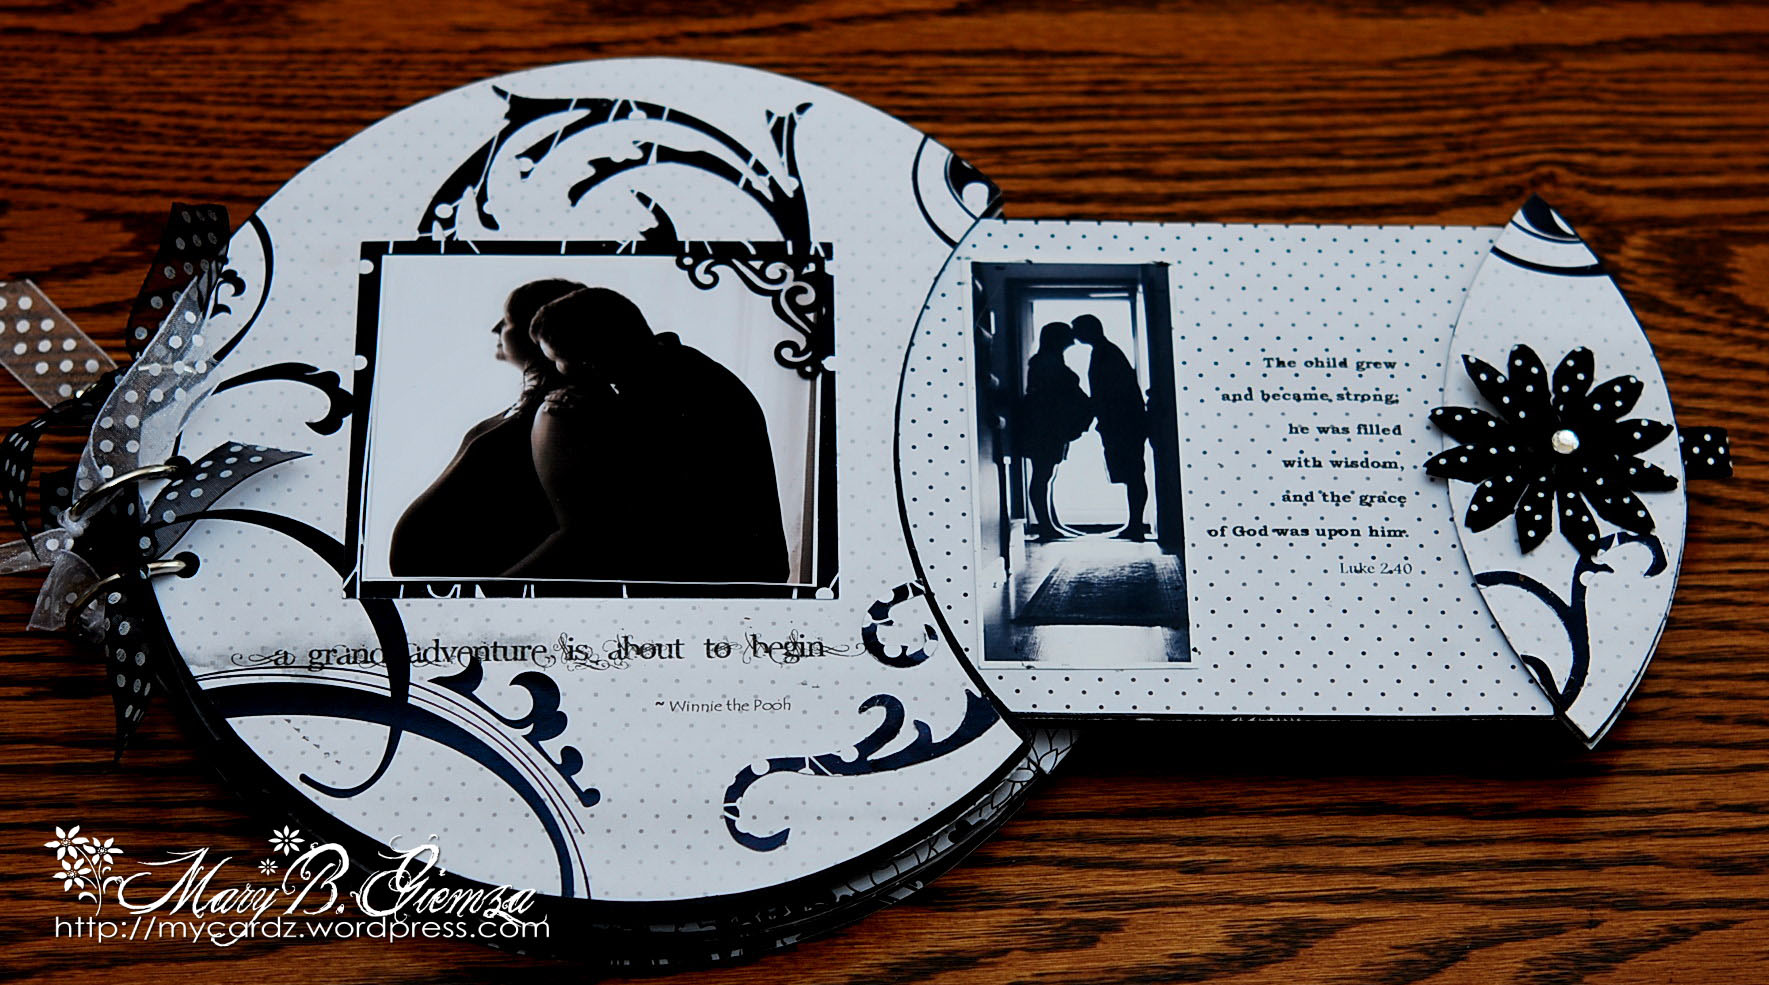
Circle Slide Book Album

Mary Giemza is a very talented cardmaker...  and she has gladly accepted to share with us this lovely tutorial...  a Circle Slide Book Album.


Here's how it is done:

I’ve been really excited to share this photo album I made for my daughter who recently gave birth to the most beautiful little baby girl ~ Quinn (a/k/a Quinney poo)!
 
It’s not a normal album either ~ each page has a mini hidden slide-out photo page.   As soon as I saw it, I knew it would be perfect for an album keepsake for the whole family.      (Please keep in mind, I’m a card girl (My Cardz) and this is my FIRST attempt at scrapbooking!  Although, I do think I have discovered a NEW hobby!!)

Here’s how the “hidden” photo is revealed . . .    (it slides out!)


And a closeup view . . .


Pretty cool, huh?  These are photos of my VERY pregnant daughter from just a few weeks ago!   

In trying to not overwhelm you, I won’t show each and every photo from the album, since there are a total of six pages, PLUS six hidden photos.     I did, however, put together a wee-little slide show of the entire album which can be found at the end of this post!    Yep, just a proud grandma!

I just LOVE this type of album, I think it would make a perfect gift for Christmas, birthdays, new babies!   :)      The album is being sold over at I Brake For Stamps.  

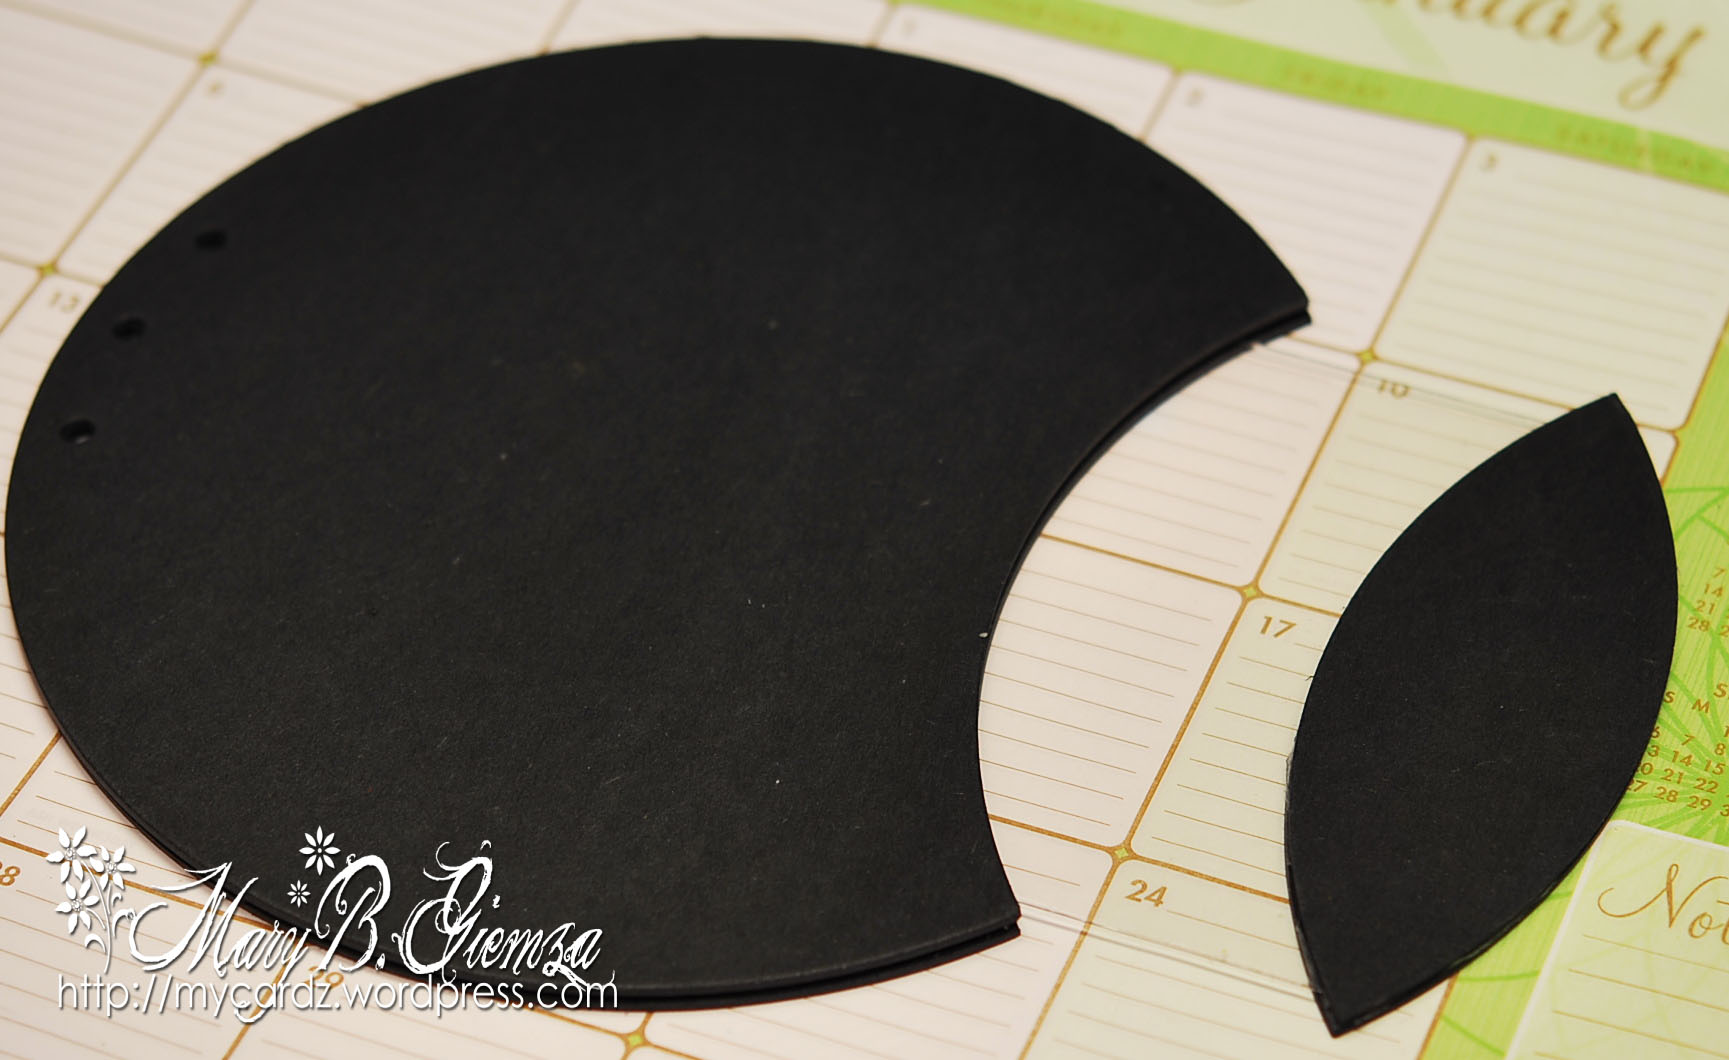
I have a few photos to show you how super easy it is to put together.   This is what you will receive in your package . . .


It may look confusing at first, but believe me ~  if I can do it  —  anyone can!      Your first step is to take one of the black chipboard spacers and a black chipboard circle . . .


and glue them together . . . always being sure to line up the punched holes.


You then peel off the blue protective film from one of the clear pull outs . . .


and glue two black chipboard pull tabs to the front and back of the square end.   (I’ve left the film on so you could see it a little easier in this photo.)


Lay this tabbed insert inside your glued circle as shown below . . .


and glue a second chipboard circle on top ~ always being sure to line up the punched holes.


That’s it!    (Of course, you have two more to put together.)     The album pages measure 8 1/2 inches, so I cut out all of my papers/cardstock  . . .


and used one of the chipboard pull tabs as a guide to cut this section to adhere to the album.


Since I was using double-sided papers, I marked the back of each piece so I would know which side I had planned to use.


And now the REAL fun begins!    Adding your photos and embellishments.    I decided to cover the clear plastic pull outs with DP also, which was not necessary – if you decide to do this, one little suggestion I have to make your life a little easier, cut and measure these BEFORE you glue your album together!   Live and learn!    If you do purchase one and run into ANY problems, please don’t hesitate to contact me and I’ll try to help.

************************************************************************

Now click -->here<-- if you want to see more of Mary's creations.

Thursday, 22 July 2010

Lottery Ticket Holder Tutorial

Hi everyone.
Here is a lottery ticket holder tutorial.

I've not included any measurements as they can vary depending on the type of ticket but they are really easy to adapt - maybe try a scratch card holder?

For this lottery ticket holder I'm using Taken with Teal for the base, Really Rust and Old Olive card with Old Olive Satin ribbon .


I roughly measured my lottery ticket and cut my Taken with Teal card slightly bigger and scored it in the centre.

For example, if my ticket measured 3" x 5" then I would cut my card to 6 1/2" x 5 1/4" and score at 3 1/4" but it's probably easier to just eyeball it.


I cut down my Really Rust piece the same width as the holder (when closed) and about 2 1/2" high.

Place your ribbon in the centre of this piece and make small tick marks on either side of your ribbon towards the right hand side of the card.


I then took my craft knife and ruler to cut a small slit in between the tick marks.


Then slide your ribbon from the back to the front through the slit like shown below.


Wrap the rest of your ribbon around the closed holder and lay the Really Rust card onto the base to ensure you're happy with the position before sticking it down.


Once you've got your placement, apply adhesive to the back of the Really Rust piece but not over the ribbon.


It should then look like this (below) with your ribbon running in between the two layers -it should be free to slide without getting caught.


Line up the ends of your ribbon to the right hand side of your holder.

On the back, run a strip of adhesive where your ribbon will lie and stick it down.


Open up your holder and line up the ticket so there is an even border that runs around it.


Make small tick marks on the top and side as shown below.


Again using a craft knife and ruler, line up the two tick marks and make a diagonal cut. Do this to the top right and the bottom right hand corners.

You can then rub out your tick marks.


Slip the corner of the ticket into these slits and your ticket will hold in place.


Next I closed the holder and tied my ribbon so that I was happy with it.

I try to leave the 'tails' a little longer than normal so that when the recipient opens it, they can close it again afterwards.


I only decided later to add a sentiment to the bottom part of the Really Rust card but using the Stamp-a-ma-jig made this really easy.


I just lined it up where I wanted the sentiment to go and stamped in Really Rust ink.


I used my A Rose is a Rose stamp set to stamp and cut out some images in coordinating inks.

For the rose I inked it up with Really Rust, stamped it first onto some scrap paper then onto some Whisper White card to get a weaker colour. Then I stamped the detailed image 'full strength' on top.

The leaves are done in the same way using Old Olive ink.


And it's really that easy, once you've made one you'll be away!


I really hope you've found this tutorial useful.

See see more of my projects please visit my blog here.

Nicci x

Tuesday, 20 July 2010

ABC-Album

Album Totalansicht

Isn’t it cute? I made this album as a present for our cat sitter who’s totally obsessed with our cat. But it works with other subjects as well – kids, parents, partners, travel destinations… whatever you like. You combine photos and attributes from A to Z. For example: A like Adorable, B like Beautiful, C like Chaotic.

I liked it so much that I made the same album for myself. If you want the pictures to be larger, just go to my original post on my website.


ZutatenYou’ll need 14 coasters. The shape doesn’t matter, square or round will do as well. They’ll be bound together with 2 album rings. I don’t have photos of the making-of itself, but the images below are quite self-explanatory.


Additional materials:
  • Pretty Paper (here: Basic Grey)

  • Glue

  • Scissors

  • Hole Punch

  • Stamp Pads

  • ABC Stamps

  • 26 Photos (3×4cm)

  • 1 Eraser, cut to the photos’ size

  • alternatively a piece of craft foam

  • Letter Stickers

  • Rub-ons

  • Pretty Ribbons

  • Embellishments

Album TitelseiteAt first you cover the coasters with paper. Put glue on one side first and attach it to the paper, let dry and trim the paper. Then do the same with the reverse side. As a glue mat, you can take an old magazine, like shown here. Punch two holes into each paper-covered coaster.


As you can see, I put the name “Joschka” (my cat’s name) on the front with rub-ons. The chipboard J is covered with white embossing powder. The little metal charms and the “Life Happens”*-tag are attached with Tacky Tape. The paper “a-z”-ribbon is attached with an eyelet.

*”Life Happens” Paper by Christina Cole, Provo Craft


Beispiel 1Write down a list from A to Z and choose images and attributes. This prevents you from being confused with all the letters later on. Print out the images in a small size, mine are 3×4cm. On the back of the title coaster, attach the letter A (a sticker or a cut-out, whatever you like). Write the attribute with letter stamps*. Take your eraser as a stamp and stamp a frame for your photo which you’ll attach slightly slanted.


*Hero Arts Assorted Letters Alphabet


Beispiel 2Use the same pattern for finishing all pages.


Beispiel 3My cat doesn’t like to travel. So I turned the German word “reiselustig” (= fond of traveling) into “reise-UN-lustig” (=NOT fond of traveling) by highlighting the syllable with the help of dymo tape.


Beispiel 4It doesn’t have to be the attribute’s first letter :D


BänderWhen you’re done: Congrats! Bind the coasters together with the rings. Knot pieces of pretty ribbon around the rings (you might want to fix the knots with a drop of glue).

When you’re making your own version of this album, please send me a pic of your creation. Thanks! And now: have fun crafting!

By the way: I love comments on my website ;)

Have a fantastic day!

Anke

Saturday, 17 July 2010

Stamping on UTEE without the melting pot

Don't you have a melting pot? No problemo.

See how I made an embellishment for my projects with UTEE and an ornate frame.

Hope you like it and thank you for your visit.

You can see more of my work on my blog