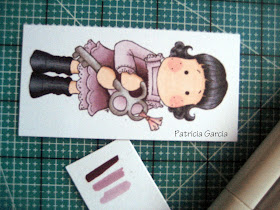
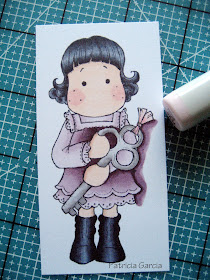
Patricia Garcia has gladly accepted to share with us this neat tutorial using Copics... and here it goes:
Shadow Tutorial...


Today I have my first attempt to a shadow around the image tutorial, I have gotten several e-mails regarding how I do this technique so here it goes...
The first thing I do is completely finish coloring my image, once that is done I choose my main colors for my shadow in this case it was V99,V95,V91 and my colorless blender(I always like to test my colors on a scrap paper first)
With my darkest color I outline my image not too much at a time that way my color doesn't dry (in this case I started with V99)
Then with my next darkest color I go over the out line of V99 blending a bit (in this case V95)
With my last color I go over both previous colors making my line a bit thicker (My last color was V91)
Finally I go over with with my colorless blender blending all 3 colors (This depends how much color you want to remove) evenly and acquiring the right shade, It's very easy and looks nice on the finished card. Thank You for your sweet comments and any questions feel free to ask, I really hope this Tutorial helped
******************************************************
For more of Patricia's wonderful work, click -->here.

A great tutorial. Thank you so much
ReplyDeleteLove Sarah XXX
This is done so well. I really need to practice with those copics, they color so nice!
ReplyDeleteHello! I'm from Finland. I don't speak englis much, but it's not necessary, You have so great pictures. I love your blog.
ReplyDeleteThanks so much for sharing Patricia's wonderful tutorial with us Yanitza, its fantastic!
ReplyDelete