Saturday, 9 August 2008

Floral Punch Craft Card

A simple Flower card with a Tutorial

I was always admiring a flower FPC card made by my friend Pam and she kindly talked me through making the flower over the telephone, mind you I'm not really sure if I did it correctly but I liked the end result so I thought I would share it with you.

Leaf Stamps, ink & Ribbon by PTI

Tutorial - How to make the red Flowers


Tools used, Punch Bunch medium Flower, large ball tool, tweezers, scissors and fine scoring tool.


Punch the flower shape out of red paper.


Turn over the flower and score 2 more lines in either side of the middle line you have just scored. You should now have 5 scored lines in total for each petal.


Using a ball tool in a circular motionpush gently on the centre of the flower until the flower is a cupped shape.


Cut a piece of black paper into a rectangle roughly 3/4 " x 2" we will use this to make the centre of the flower.


Fold the rectangle in half to make a
thinner rectangle.


With your scissors cut little snips along the length of the folded paper from the open ends towards the folded edge about 2/3rds of the width of the paper, continue all the way to the end.


Once you have made all of the snips your folded paper will look like this.


Spread glue along the fold and nip the end of the paper in your tweezers, start to turn the tweezers towards the glue winding the snipped paper around the tweezers until you get to the end of the paper.


Once the flower centre is set, splay out the cut paper with your
fingers untill it forms a pom pom then remove it from the tweezers.


Add a wet glue to the center of your flower shape & add the pom pom quilled shape on top of it.


This is the finished flower I used 3 to make the card, I added some punched out leaf shapes to finish the arrangement.


*****
A note from Julie
Stunning card Jak and another brilliant tutorial!!
Head on over to Jak's wonderful Crafters Kitchen Blog for more inspirational creations

Thursday, 7 August 2008

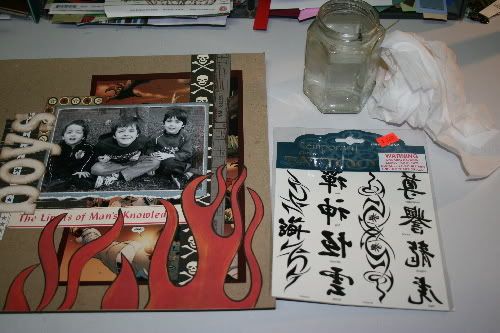
Using Fake Tattoos

I love using Rub Ons but sometimes I can't find exactly the one I need - OR they are so expensive I can't afford to stock such a huge range.
So I have taken to using kids fake tattoos as part of my "Rub On" range - they come in all shapes and sizes and best of all, they are tailor made towards the types of things the kids like!
They are particluarly good for boy LO's - especially the Tribal tattoo designs.

Follow these easy steps and have a try at putting some "Fake Rub ON's " on your LO:

You Need:
Container of water
Fake Tattoos
scissors
tissues
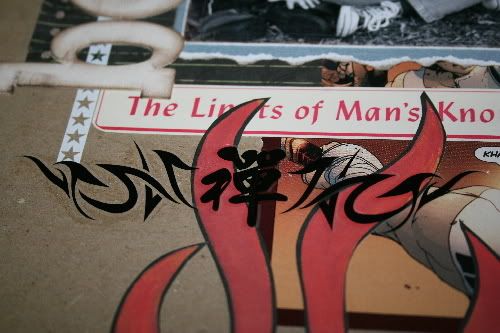
Your LO almost completed.


Photo Sharing and Video Hosting at Photobucket

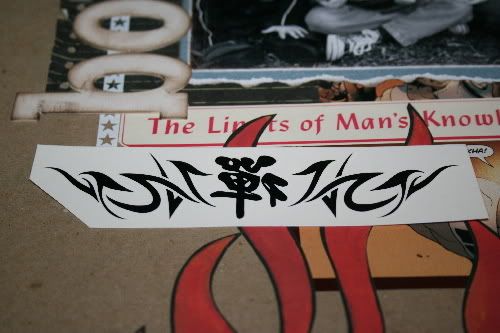
Place the tattoo on the spot you would like it to go FACE DOWN.

Photo Sharing and Video Hosting at Photobucket

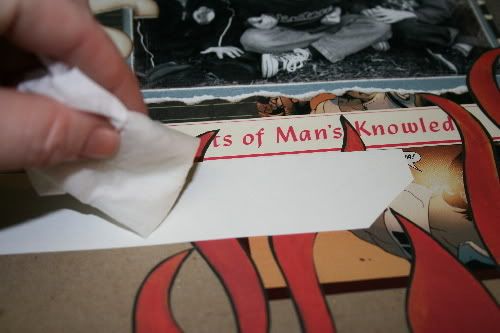
Wet a tissue until it is sopping but not DRIPPING and dab gently at the back of the tattoo. It will start to become less opaque.

Photo Sharing and Video Hosting at Photobucket

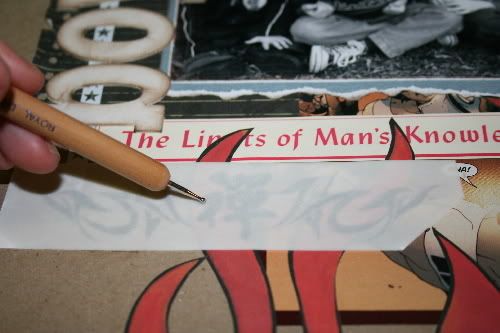
Use the back of a spoon or an embossing tool to gently rub on the back of the tattoo to make it sure it "grabs".

Photo Sharing and Video Hosting at Photobucket

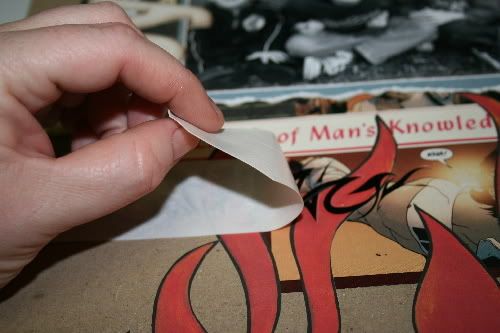
Carefully peel off the tattoo.

Photo Sharing and Video Hosting at Photobucket

Photo Sharing and Video Hosting at Photobucket

*****
A note from Julie
What a great idea Sarah and a fantastic layout too!!
I'd never have thought about using fake tattoo's.
For more inspiration go and visit Sarah's fantastic blog HERE

Tuesday, 5 August 2008

Cupcakes YUM

I know there's a million cupcake cards etc out there but who can ever get enough of them...well now there's a million and one. Im sharing my cupcake card and pattern with you all.

For this card project you will need:

Vanilla or chocolate card stock for the base card.
Vellum for the front of the base card.(cupcake wrapper)
three different colours of card stock for the icing layers.
Red card for the cherry.
Brown card for the cherry stalk.
Cuttlebug emboss folders.
Ribbon and a cute tag.
different colour inks.
Gliter and Dimensional magic.


Now you have all this lets get started. Using the pattern below cut out the base card on the fold. the embossed vellum and cut to fit the front. Emboss the three icing layers with tree different emboss patterns.

Working with the base card...here shown as vanilla cake....attach double sided tape across the top and bottom of the card front and stick your vellum cupcake wrapper over the top. Using a brown ink and sponge, soften all the edges which will help hide the tape under the vellum and look like your cake is cooked to perfection.


Next Ink the edges of the icing layers in the colours to match, punch a 1" circle for the cherry and use the off cut of the circle punch(in brown) to help you cut a stalk, ink these two in black.

These are all our parts done now lets put it together. Lay a strip of foam tape along the top of your card frontTape down the largest icing layer paying attention to where the top of the card is.....shown here in arrows. this is the back view.

Next put another strip of foam tape on the lower part of the next icing layer so you wont see this tape showing at the back.

Do the same with the smallest icing layer.

Heres a back view of the card....the reason i show this is that if your going to make beautiful hand made cards you might as well do the best you can and make it look the neatest you can....no nasty foam tape showing here :)

Now you will shape your cherry with an embossing tool.

and attach foam tape to the back being carefull not to let the tape show after its stuck down.
Glue down the stalk and to acent the cherry ive use a small punch peice at the base of the stalk in black.
Heres a close up

Attach the ribbon...i made a card incert to cover the ribbon and tape inside the card.

An i used these cute little bread clip dies from sizzix for the message

Clip this over the ribbon and keep in place with some foam tape.

Lastly use some kindy glitz glitter on the embossed icing and dimensional magic or crystal laquar on your cherry to give it a yummy shine.

Good enough to eat!!!!!!!!

Hope you enjoy .........Valita
******
A note from Julie
ooh that really does look good enough to eat!!
Thanks for another fantastic tutorial Valita
Go and check out Valita's fantastic blog HERE